BRR Training - Basics
What is BRR?
The Business Relationship Reporting system (BRR) is used by University and Hospital employees to disclose professional, foreign, or financial relationships that reasonably appear related to their professional responsibilities to the University or Hospital.
More information about the types of relationships that need to be disclosed can be found on the Conflict of Interest website here.
The BRR site can be accessed here: brr.utah.edu
Dashboard
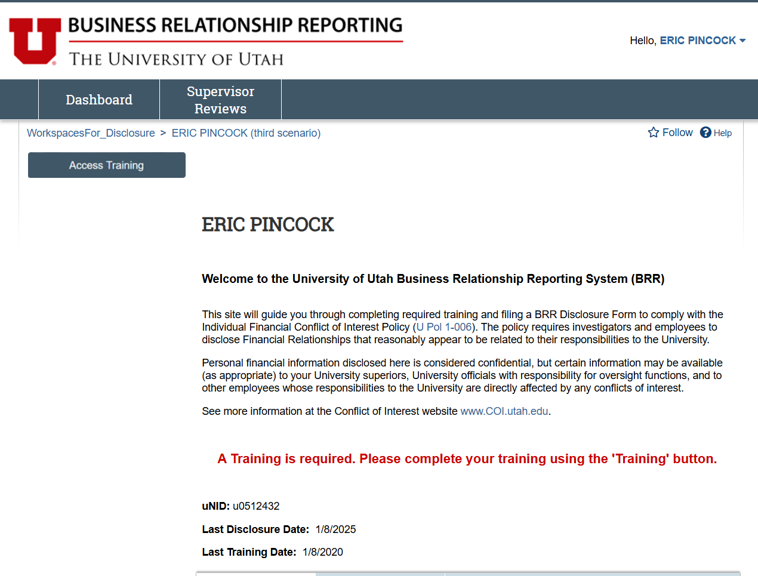
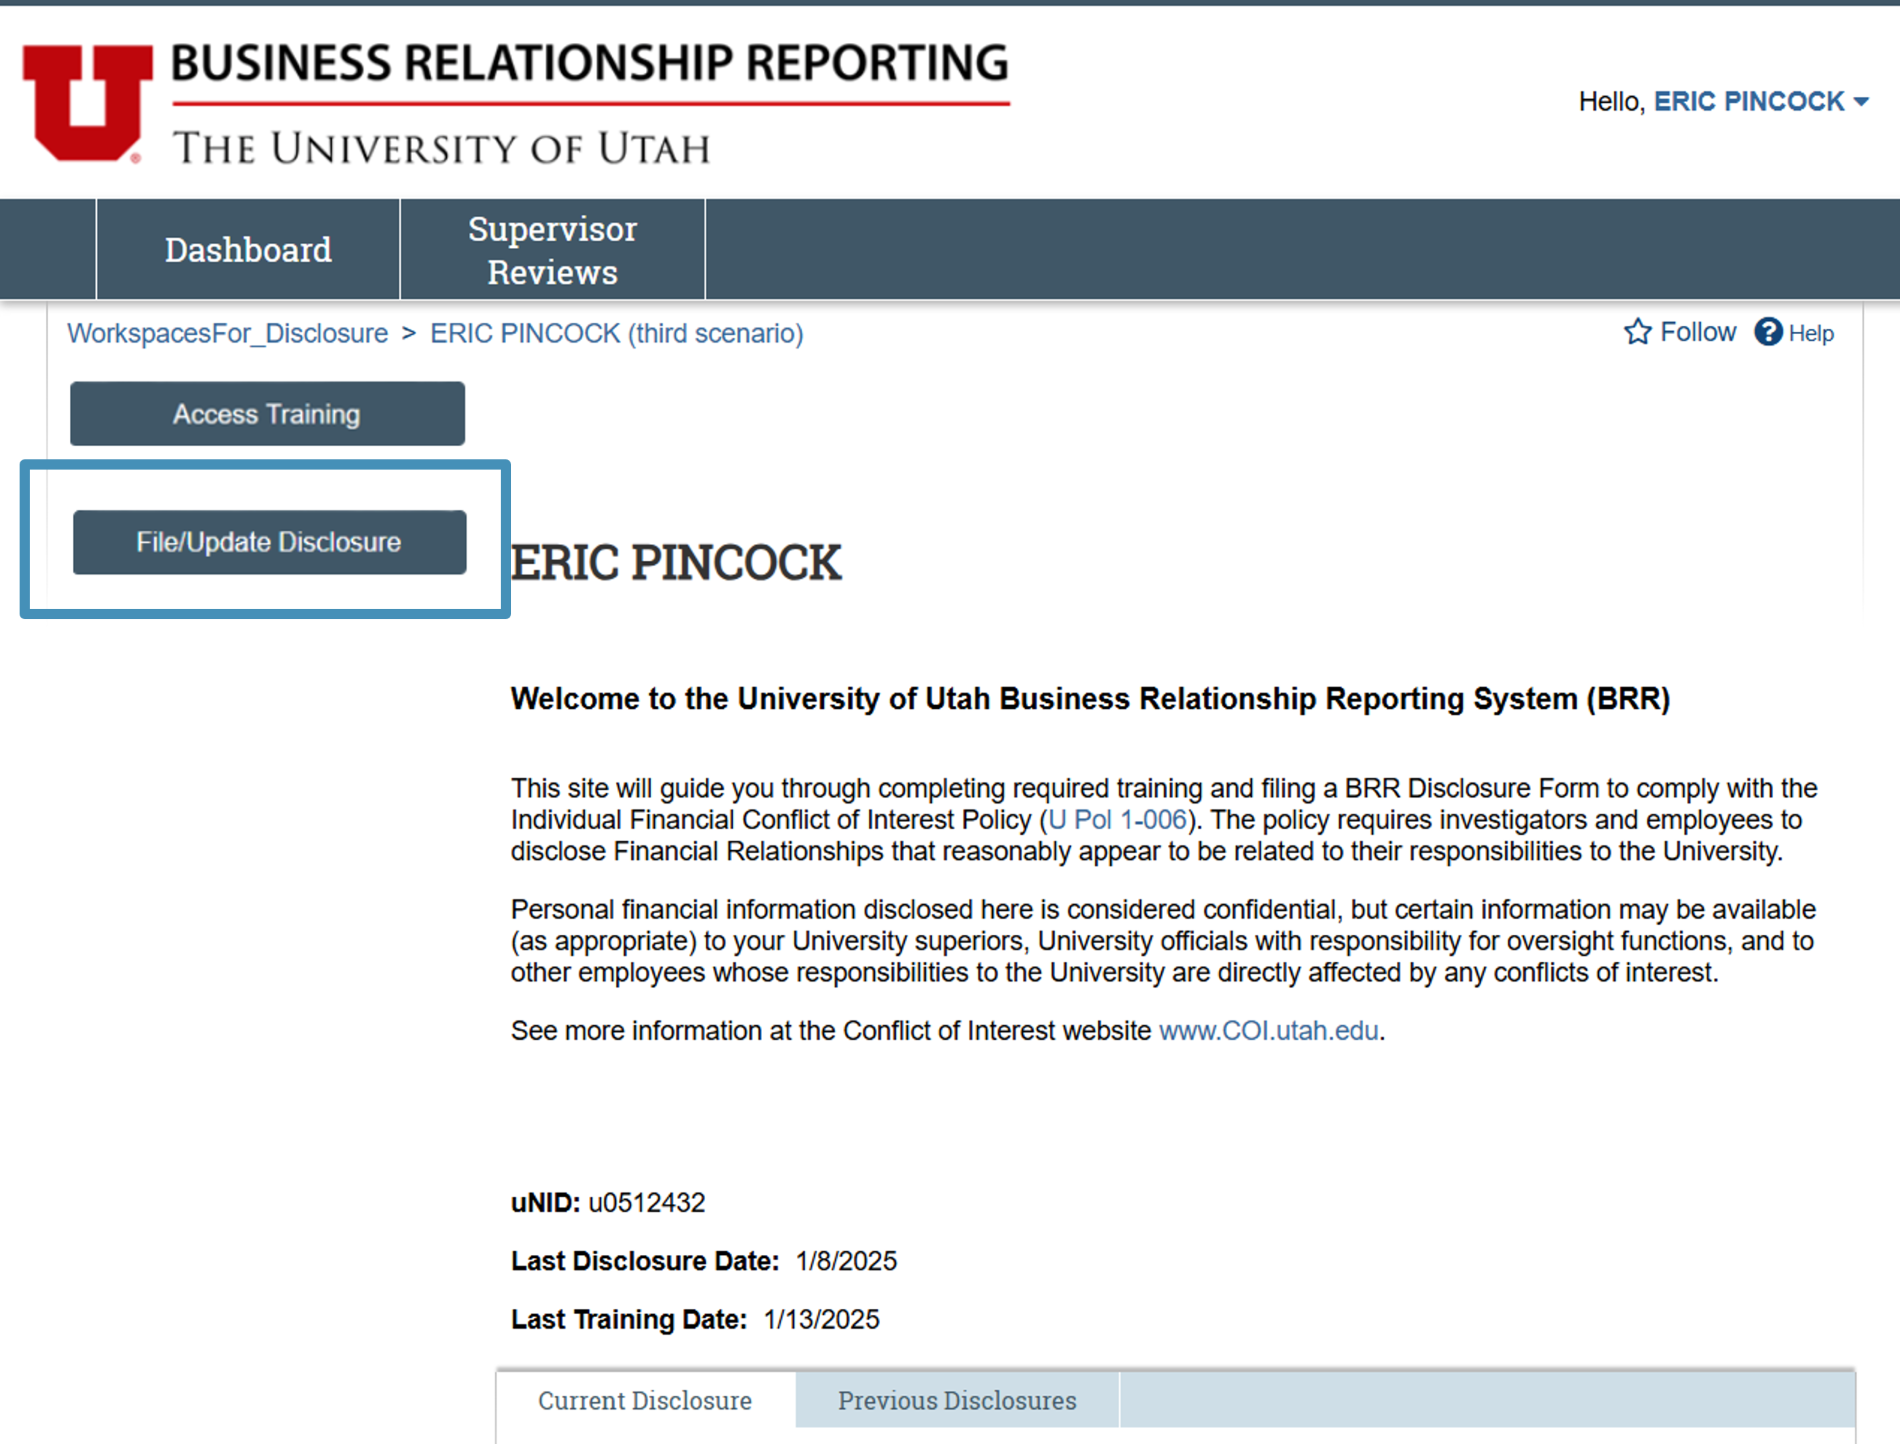
After signing in you will be taken to the BRR Dashboard.
This page will be used to:
- View your current and previous disclosures
- File/Update your COI Training
- File/Update your disclosure
Note: Not all disclosures that were filed before the BRR site update will be accessible from the “Previous Disclosures” tab on the dashboard.
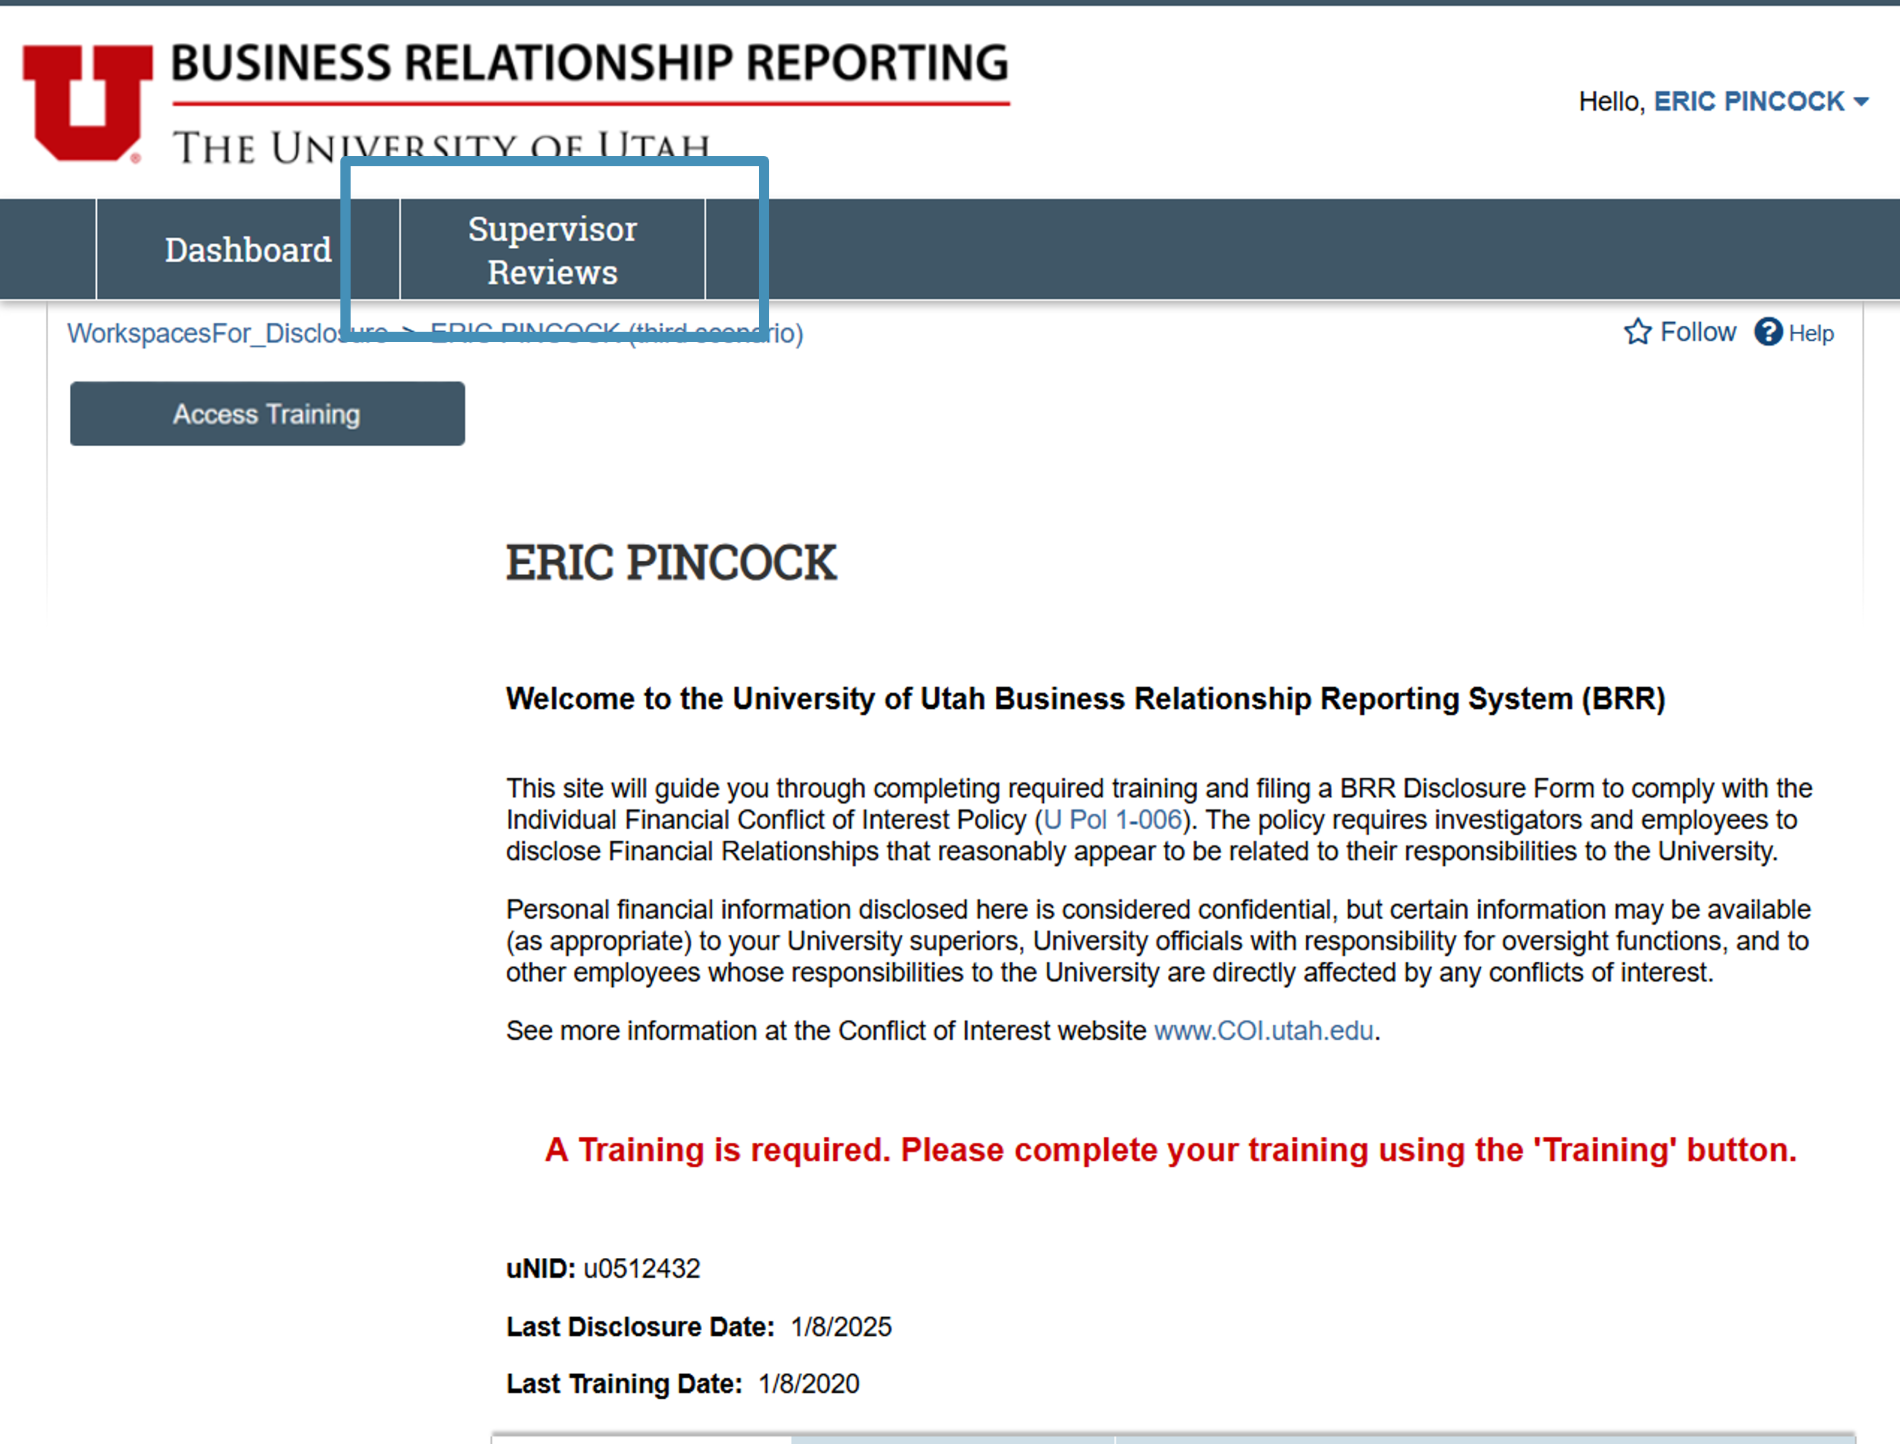
Supervisor Reviews
All registered users will be presented with the “Supervisor Reviews” tab at the top of the page.
Only supervisors who are required to review users’ disclosures will utilize this page.
COI Training
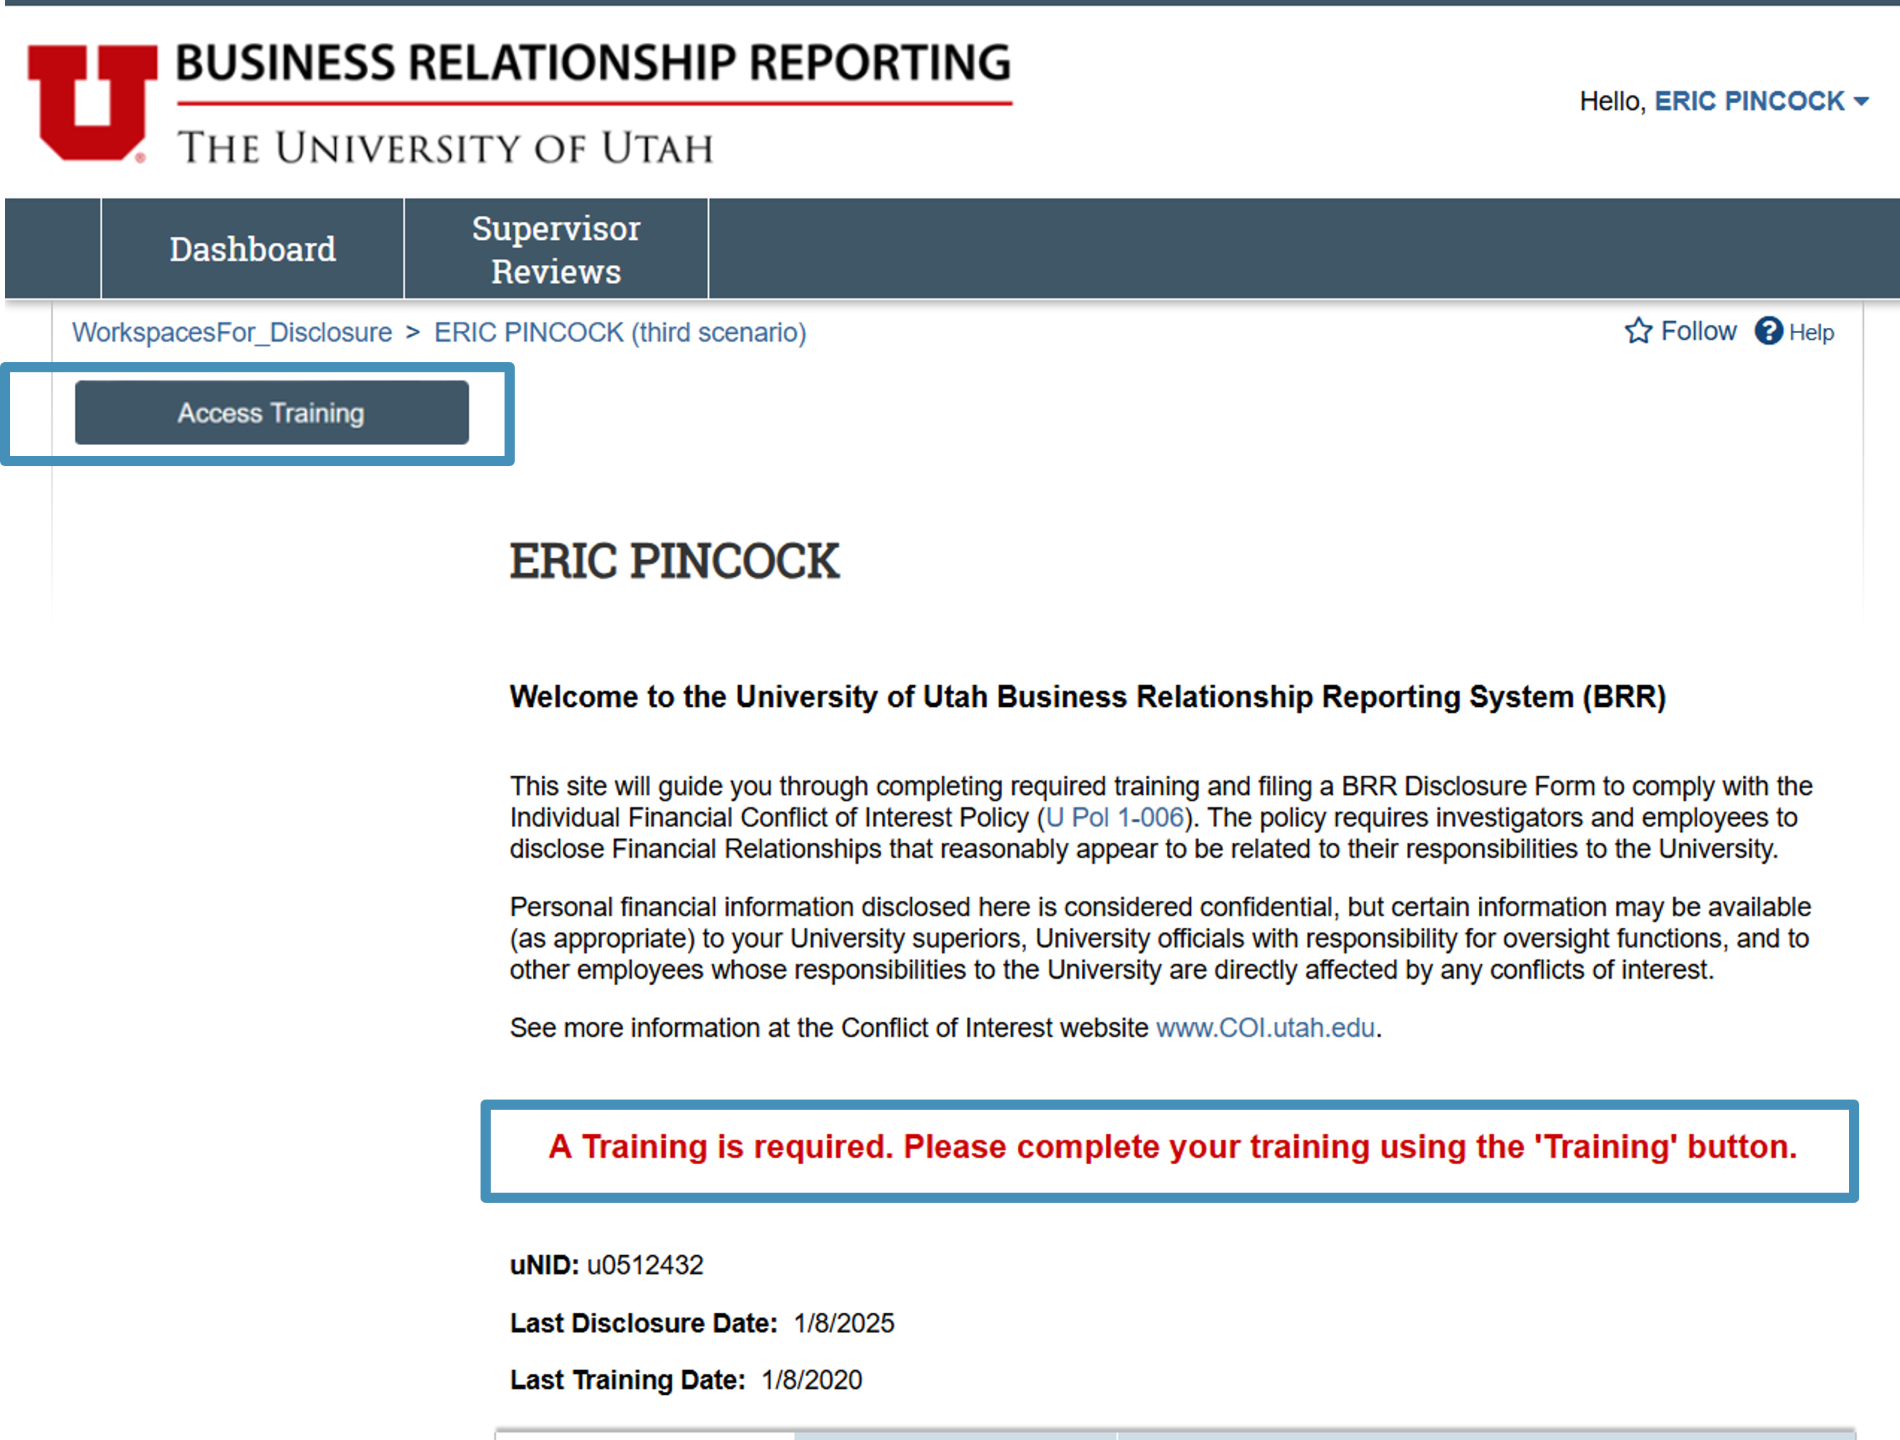
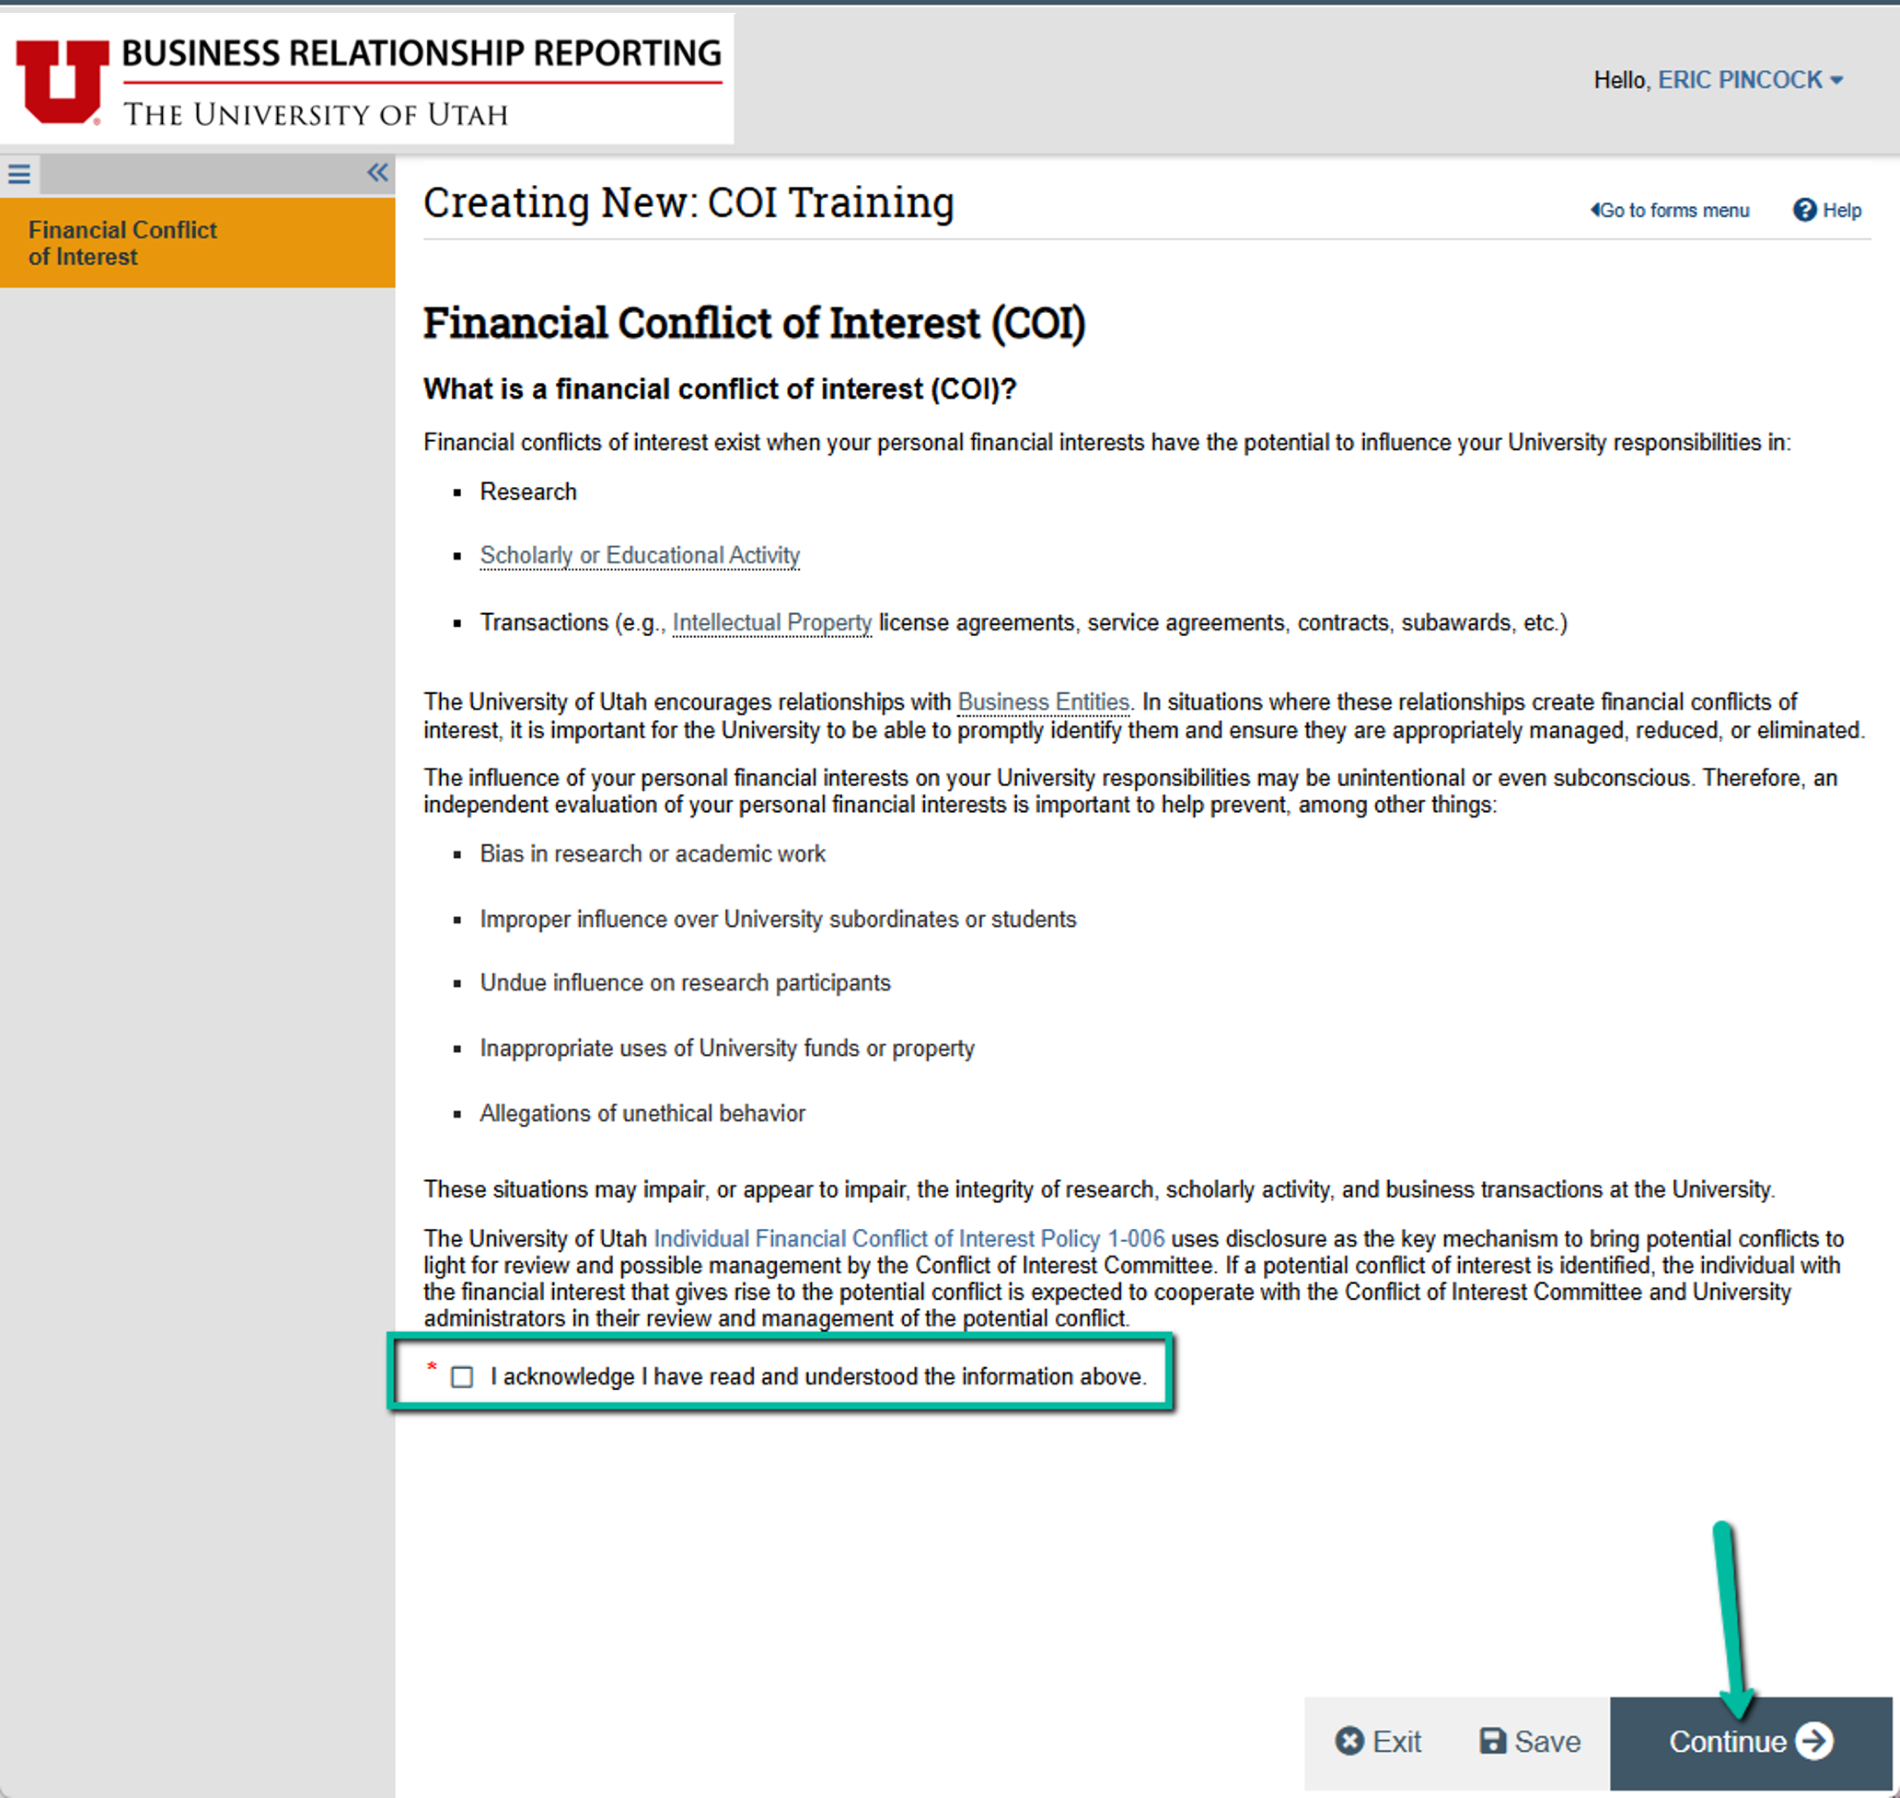
If it is your very first time accessing the BRR system, or if your training has expired, you will need to complete the COI training before you’re able to file/update your disclosure.
To complete the COI training click on the “Access Training” button in the top left of the page.
The COI Training educates users on the COI policies that are required on a disclosure, why the University asks for the information, and how this information may impact the research performed by the University.
You can use the provided links within the form to visit the COI website where you can read a more in-depth explanation on these policies.
Each page of the training requires the user to read over the provided information and click the acknowledge box saying they’ve understood the information.
You can advance to the next page by clicking the continue button in the bottom right corner.
Once all the pages have been read and acknowledged you can click on the “Submit” button that appears at the end of the training.
After submitting, you should see the “Last Training Date” on the dashboard update to reflect your new completed training date.

To start or update your disclosure you need to click on the “File/Update Disclosure” button in the top left corner of the dashboard.
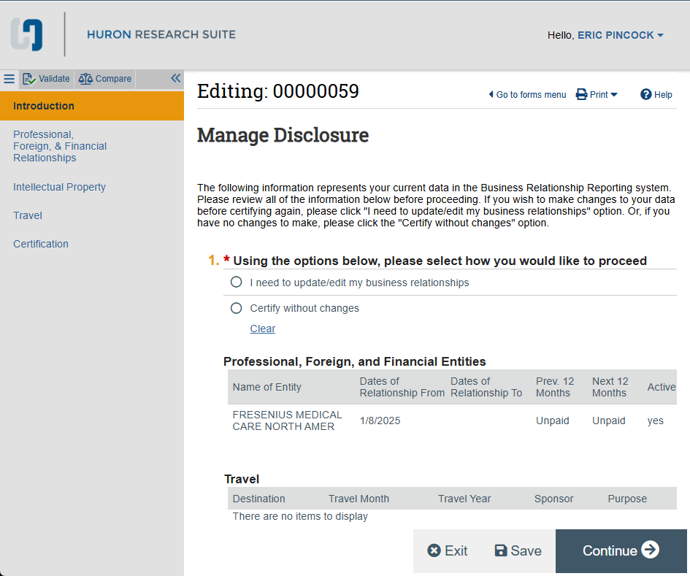
This page will open the disclosure smart form where you can file a new disclosure or update existing information.
First time users will be taken directly to the first page of the disclosure form (Professional Foreign, & Financial Relationships), since there isn’t a disclosure to update/certify.
If you have an existing disclosure, you will be taken to the Introduction page, where you’ll be given the option of updating/editing your current relationships or, if there are no changes necessary, you can certify without changes.
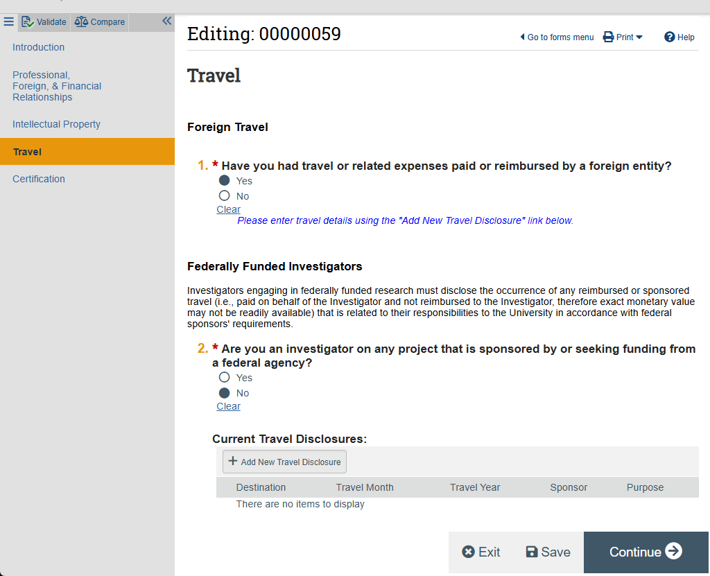
As you work through the different pages of the disclosure your answers will affect
what information is displayed and if more details are necessary.
If more details are required, it will show up in the disclosure form as a table at
the bottom of the page.
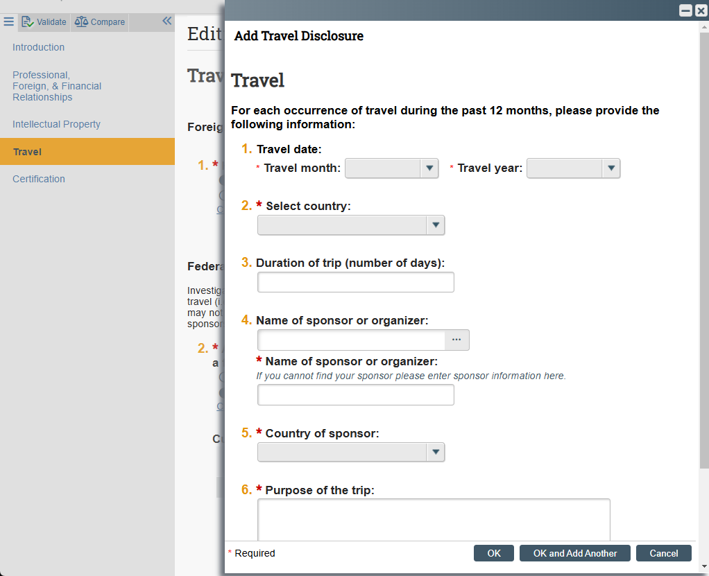
In this example, additional “Travel Disclosure” information is required.
To add that information you will click the appropriate “+” button above the table.
Once you click on the “+” button, a new portion of the form will slide out requesting more disclosure details.
If you need to add multiple entries hit the “OK and Add Another” option to create another entry. Otherwise, you can click the “OK” button to close out the window once you’re done. “Cancel” will close the window without saving.
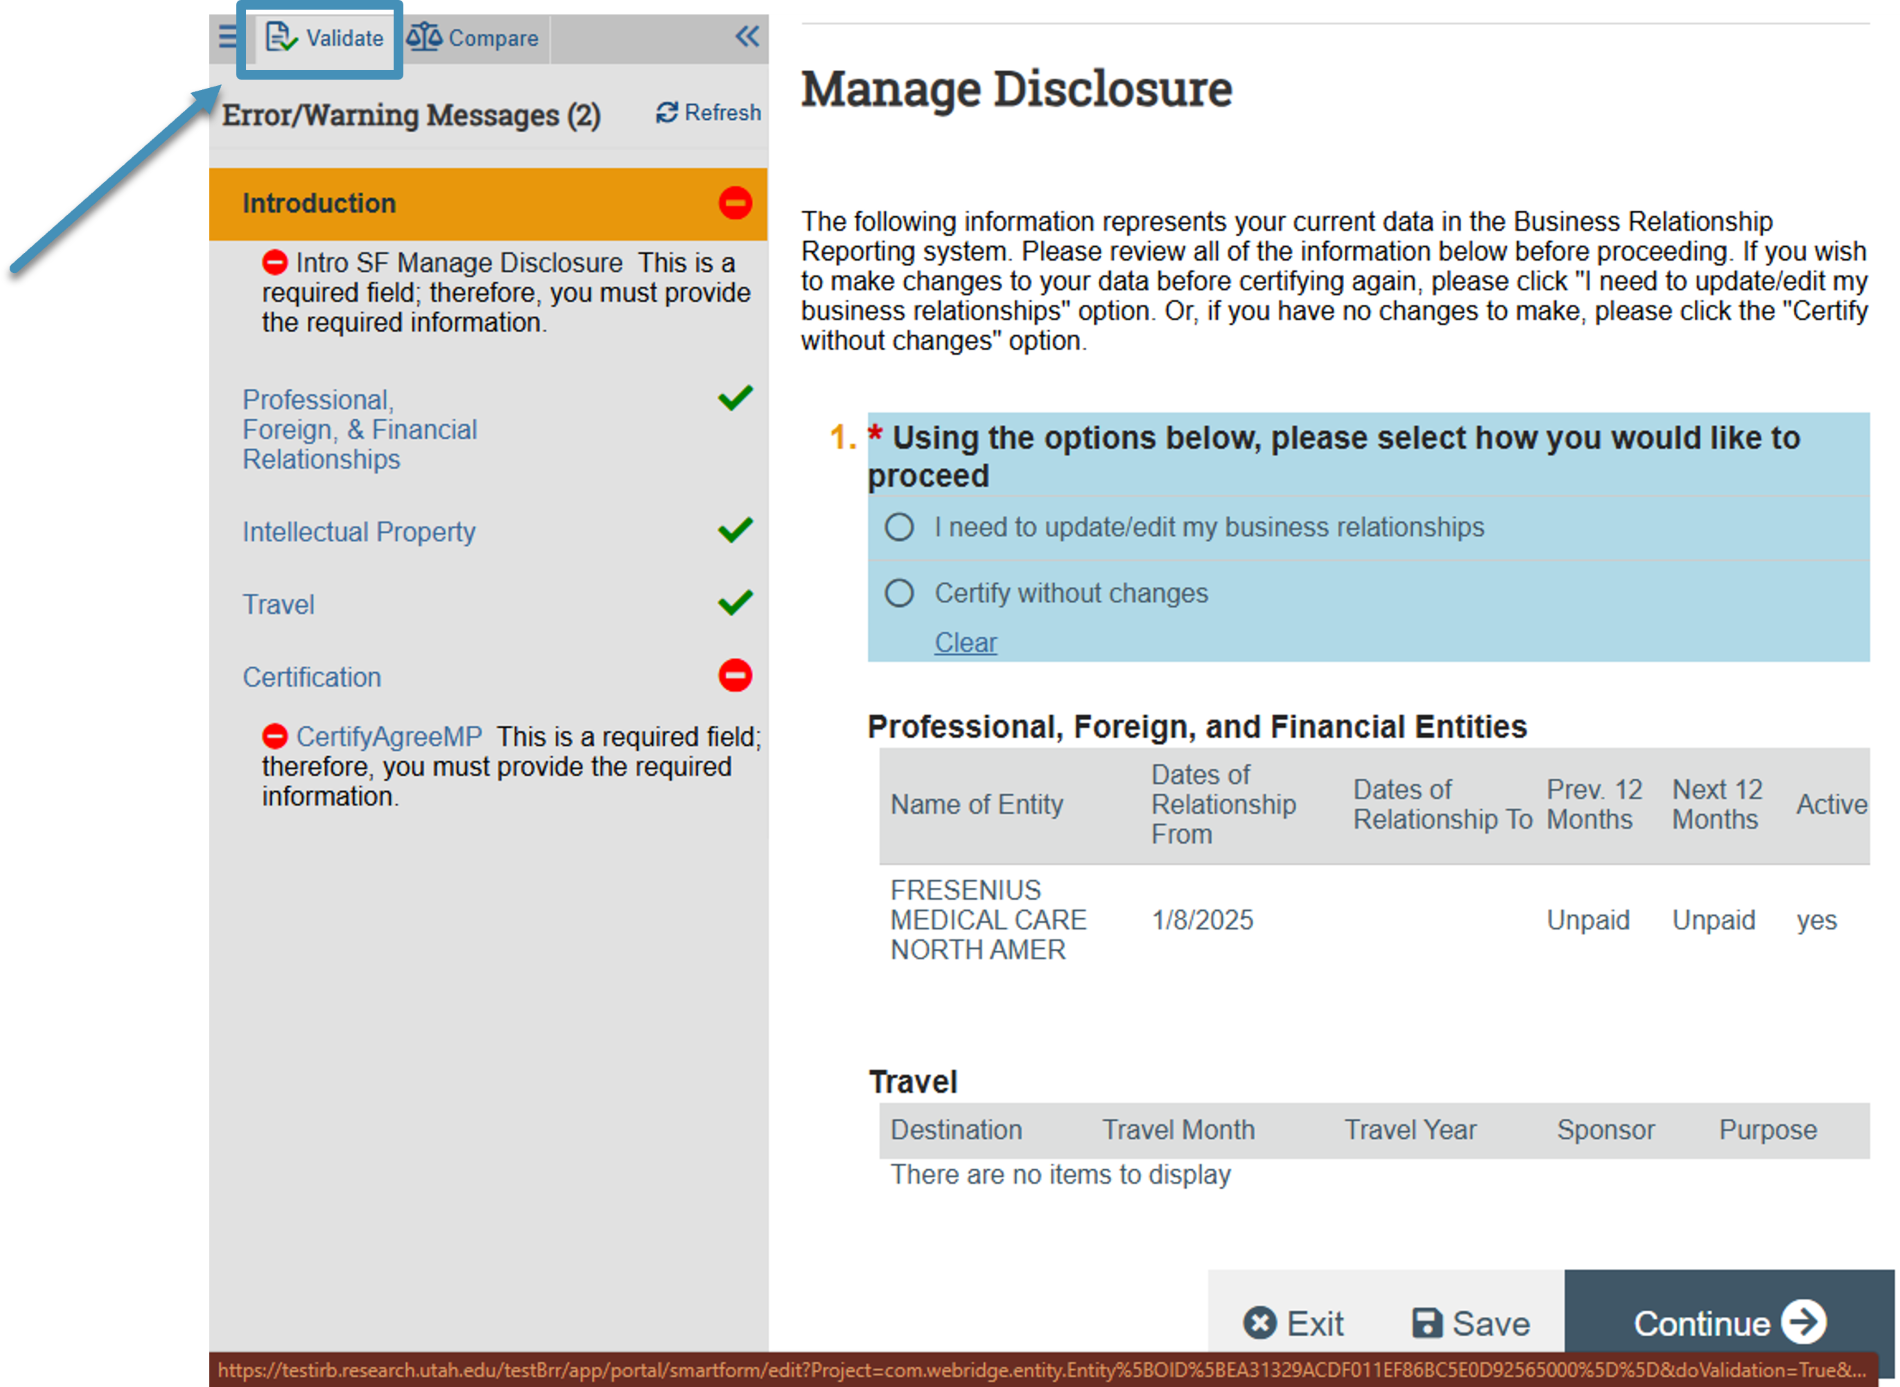
You can use the “Validate” button in the top left of the page to check if there are any pages or items that were missed as the form was filled out.
This will run a check for any missing information that needs to be added before you can submit the disclosure.
You can click on any of the blue text in the left-hand menu to navigate directly to the affected portion of the disclosure, and the page will highlight the offending section.
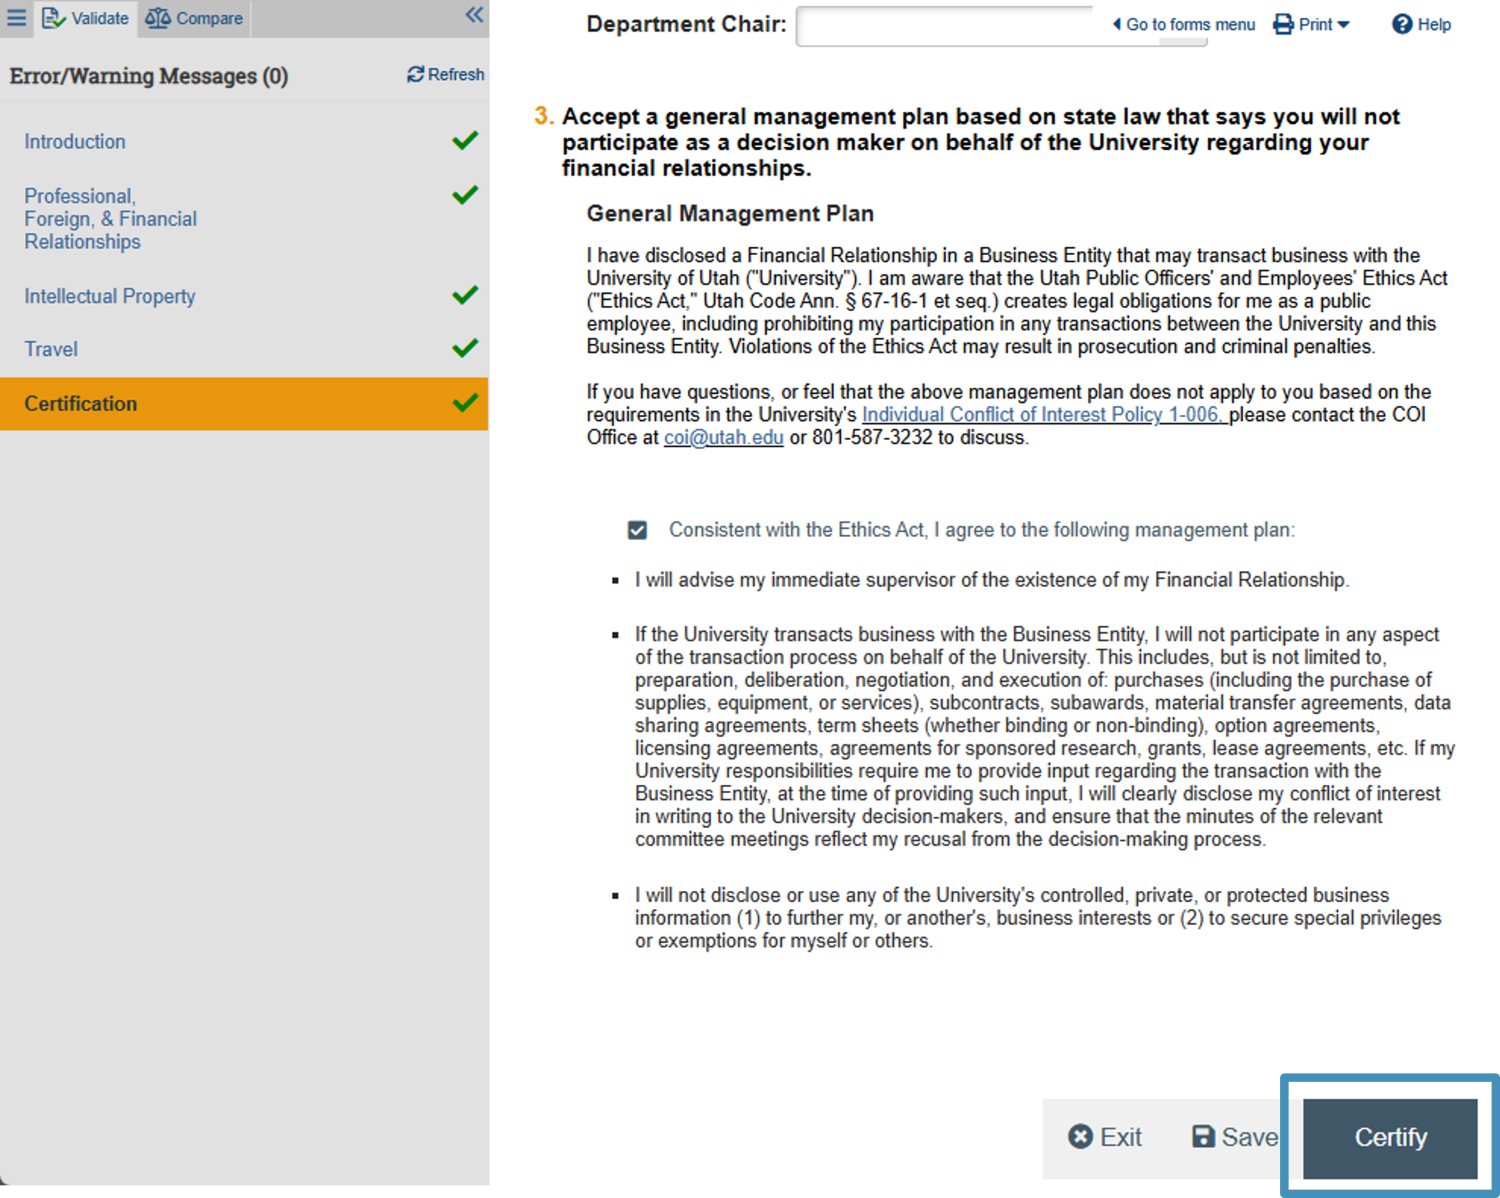
If details of your disclosure require you to accept a General Management Plan your supervisor and department chair will be required and the management plan language will be provided.
You will have the ability to update your supervisor and chair. You can also include additional supervisors if needed. Anyone include here will be notified of your disclosure after certification.
To add or search for someone in the name field you can search for your supervisor by name, and it will auto populate with a list of options. Click on their name to add them to the form.
If you need to remove a selection, just click the “X” to right of the person’s name, and search again.
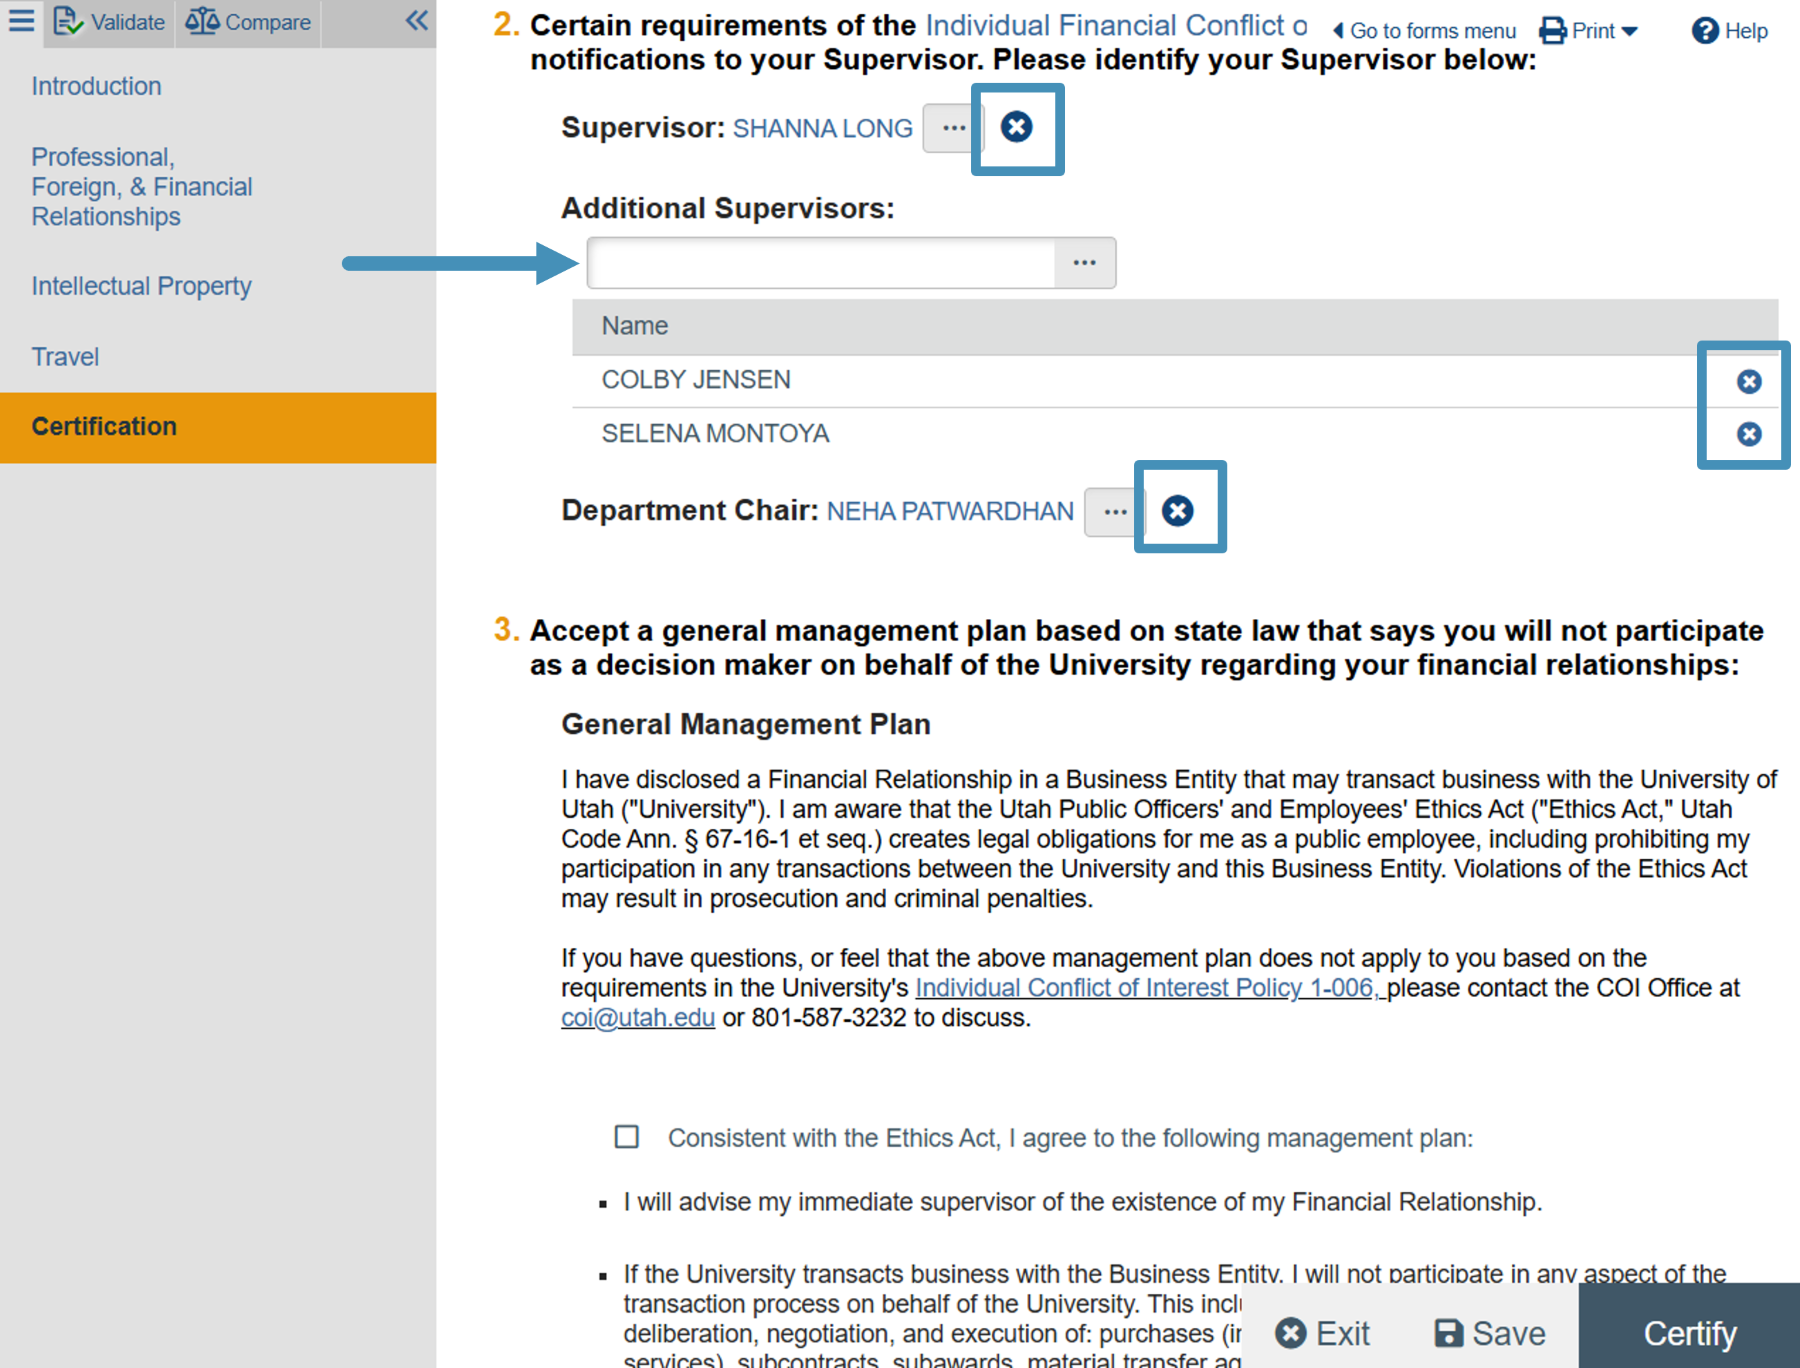
If a General Management Plan is required, you must select the check box indicating that you agree with the proposed plan and will comply with its terms.
Once everything has been properly filled out, you can use the validate button in the top left and see that every page has a green check mark next to it indicating that there’s no missing information.
You can click the “Certify” button on the bottom right-hand corner of the page to verify all the information is correct and complete the disclosure submission process.